May: Form & Scale
Explore more curriculum themes
May: Form & Scale
Es Devlin often works with a limited vocabulary of forms. Basic shapes such as cubes, spheres, triangles, and ellipses evolve into her complex stage designs and stadium sculptures. On stage, she makes these familiar shapes behave in new ways, often transforming them through light, projection, and movement to support a story. The scale of her sculptures also changes how they appear to and effect an audience. A small cube packed with actors might seem fragile and about to break open, while a giant cube framing a pop artist might seem powerful and strong.
As we move through the world, we often look for and respond to forms and scale without thinking about it. We see basic shapes in the patterns of flowers or the forms of buildings, and we feel like we take up more space in a crowded elevator than we might while stretched out in an open park. The exercises and materials on this page will prompt you to think more mindfully about form and scale, allowing you to play with these basic elements as tools in your own creative practice.
Table of Contents
- Prompts: Quick writing or visual activities
- Exercises: Activities that might ask you to spend a little more time
- Related Reading: Highlights from Cooper Hewitt, Smithsonian Design Library
- Programs: Exhibition tours, lectures, and hands-on workshops for visitors at all age and experience levels
PROMPTS
Scale can affect the whole meaning, purpose, and tone of an object or space—it helps us make sense of the world. These prompts are designed to help you think about and play with scale all around you. They are geared toward ages 15 and up, but all are welcome to try them out!
The only materials you need are a pencil, a piece of paper, and a camera, but feel free to play with any other supplies you may have on hand.
Playing with scale
1. Observing Scale
Go on a walk to various outdoor or indoor spaces and think about how your body relates to the size of the space. How does that relationship make you feel? Note the size of doorframes, windows, elevators, staircases, and ceiling height. If you’re outdoors, note what you see when you look up or to your sides. How does the scale of the space or parts of the space relate to its intended purpose or function? Write down your thoughts and observations.
2. Forced Perspective
You may have come across fun photographs of someone appearing to pinch a sunset with their fingers or holding a large building in the palm of their hand. This manipulation of scale is a technique known as forced perspective. It uses optical illusion to make objects appear larger, smaller, farther, or closer than they really are.
Grab a friend and camera and find an object whose scale you want to manipulate. Frame an image that has both a person and the subject you’re manipulating. Play with how far or close the person and subject are to each other to make it appear as if the scale of the object has changed. For example, you could move a small potted plant close to the camera and position a person far in the background to make the plant look like a giant tree. For large objects, try reversing these positions to make a structure such as a building look as if it could fit between your fingers.
3. Shifting Scale
Select an object that you use in your daily life—a chair, a toothbrush, a pencil, or something else. Draw or write down what you use that object for. Think about how you would use the object differently if you shifted its scale. Draw or write how the function of the object might change if it was:
- The same size as you.
- The size of your palm or thumb.
- Five times the size of you.
4. Imaginative Scale
Below are three objects from Cooper Hewitt’s permanent collection. Without a person in these photographs, it can be hard to tell their scale and function.
Based only on these images, brainstorm how big you think the objects are and what they might be used for. Think about scale. Are they things you can fit in the palm of your hand, or are they the size of a room? When you’re done, click the links below to learn about each object.
- Object one (left image)
- Object two (middle image)
- Object three (right image)
EXERCISES
Exercises are activities that might ask you to spend a little more time or to gather and play with some additional materials.
3D Collage Cube
Collaging is often done on a flat, two-dimensional surface. This exercise will help you practice moving to three-dimensional thinking. As you work through the exercise, think about depth, shape, and movement. The theme of your collage is up to you! You could approach it as a mood board of things you like, things that inspire your creative practice, or something else entirely.
Materials needed:
- A small cube box, print a cube template, or, to make your own:
- 11 x 17-inch paper (cardstock recommended)
- Square ruler, with a 90-degree angle
- Cutting mat
- X-Acto knife (or scissors)
- Glue
- Scissors
- A pencil
- Magazines, photos, colored papers, or other collage materials
- Colored markers or pencils if you wish to draw
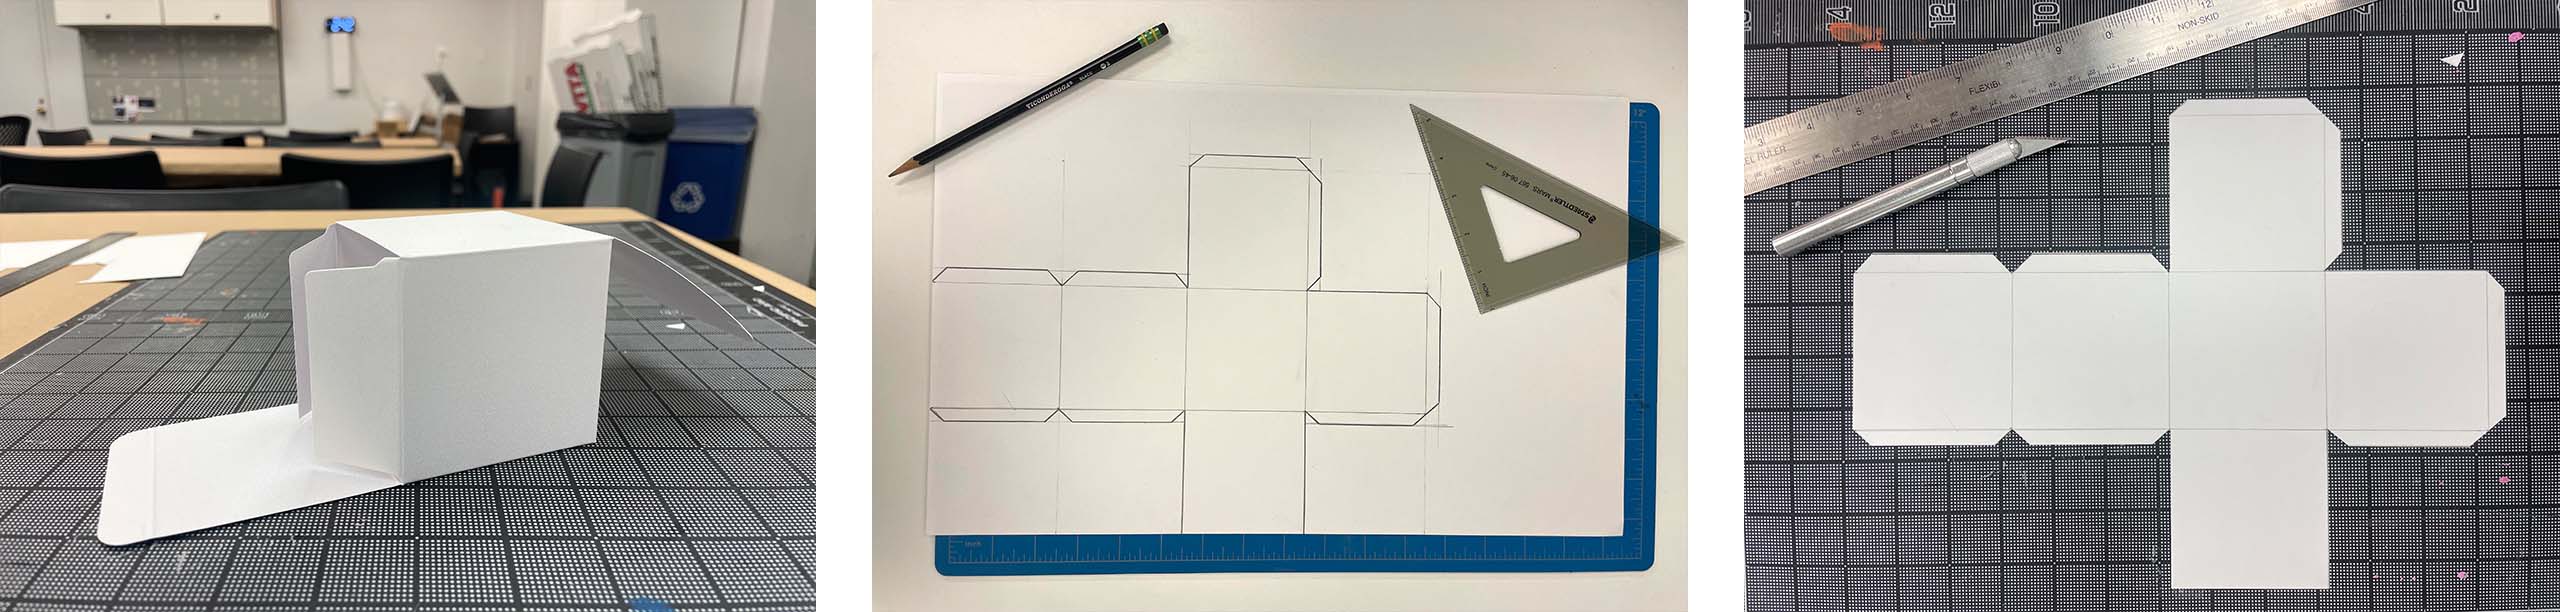
1. Prepare your cube
If you’re using a box that you already have, disassemble it so it lays flat. To create your own cube, take a piece of 11×17-inch cardstock or paper. Using a pencil and square ruler, draw out six 3-inch squares as in the picture below. Draw tabs on the sides of your squares to assemble the cube later. When you are done drawing, cut out your cube with scissors or an X-Acto knife.
If you have access to a printer, you can also print the attached template, cutting and folding along the lines to create a cube.
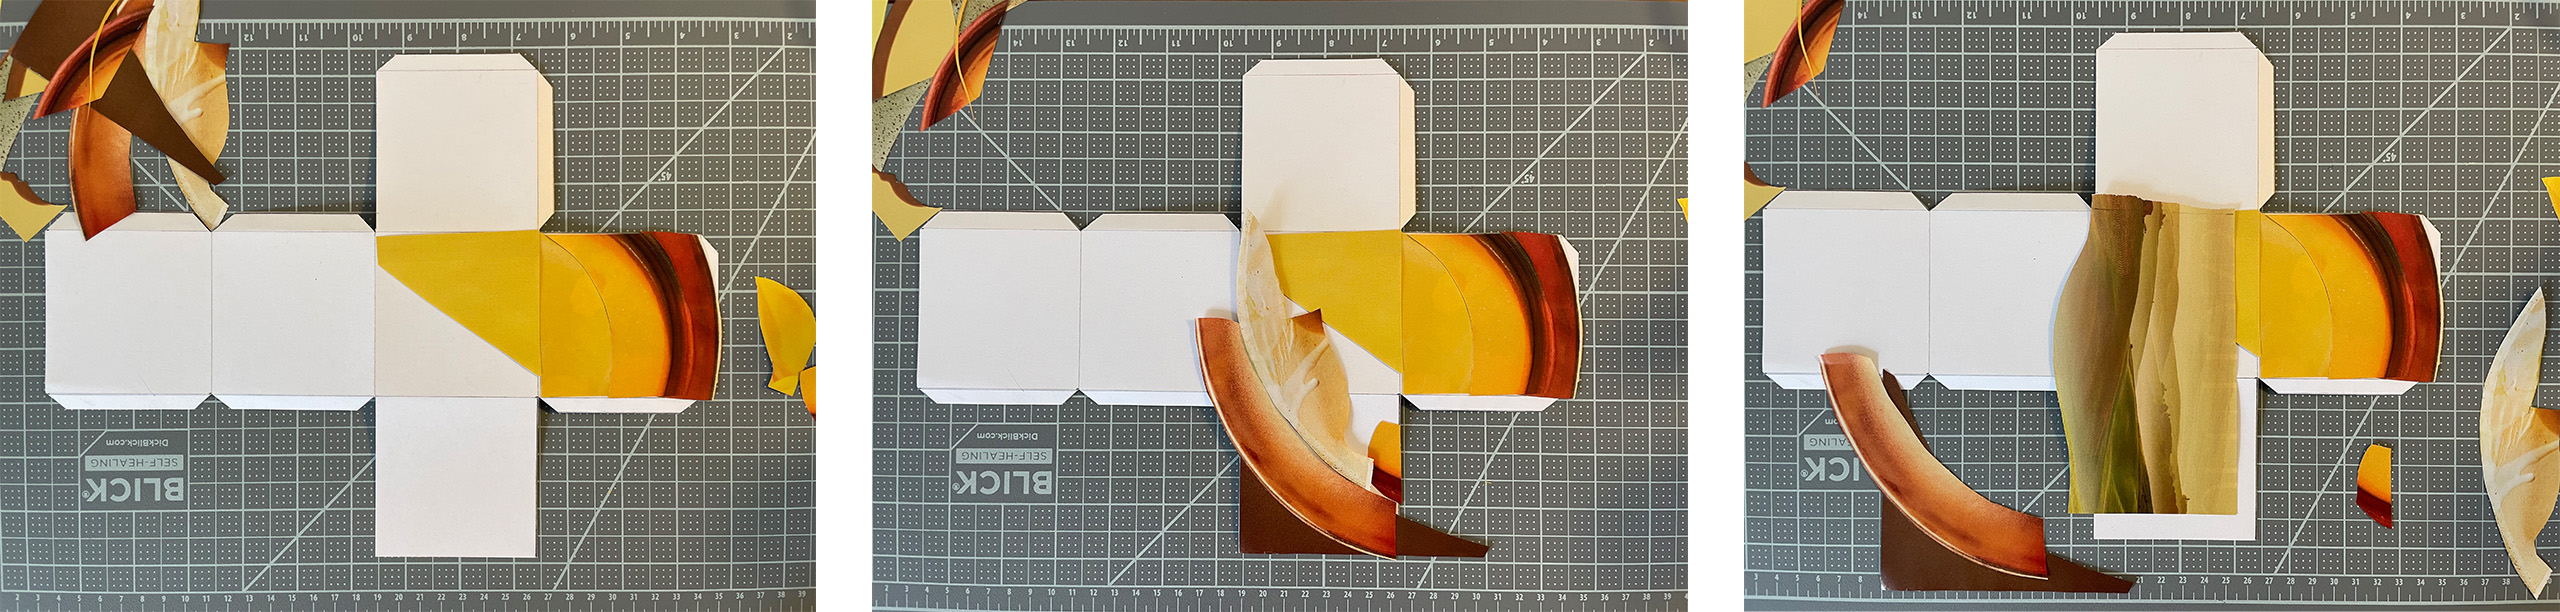
2. Gather your collage materials
Cut out parts of a magazine or photographs that interest you. Include various colors, textures, shapes, and text so you have a range of material to play with.
3. Collage your cube
Before gluing anything down, take your cut outs and play with different layouts to find a composition you’re happy with. Take photos of the composition so you have reference images for where to glue them onto your flattened box.
As you collage your cube, consider:
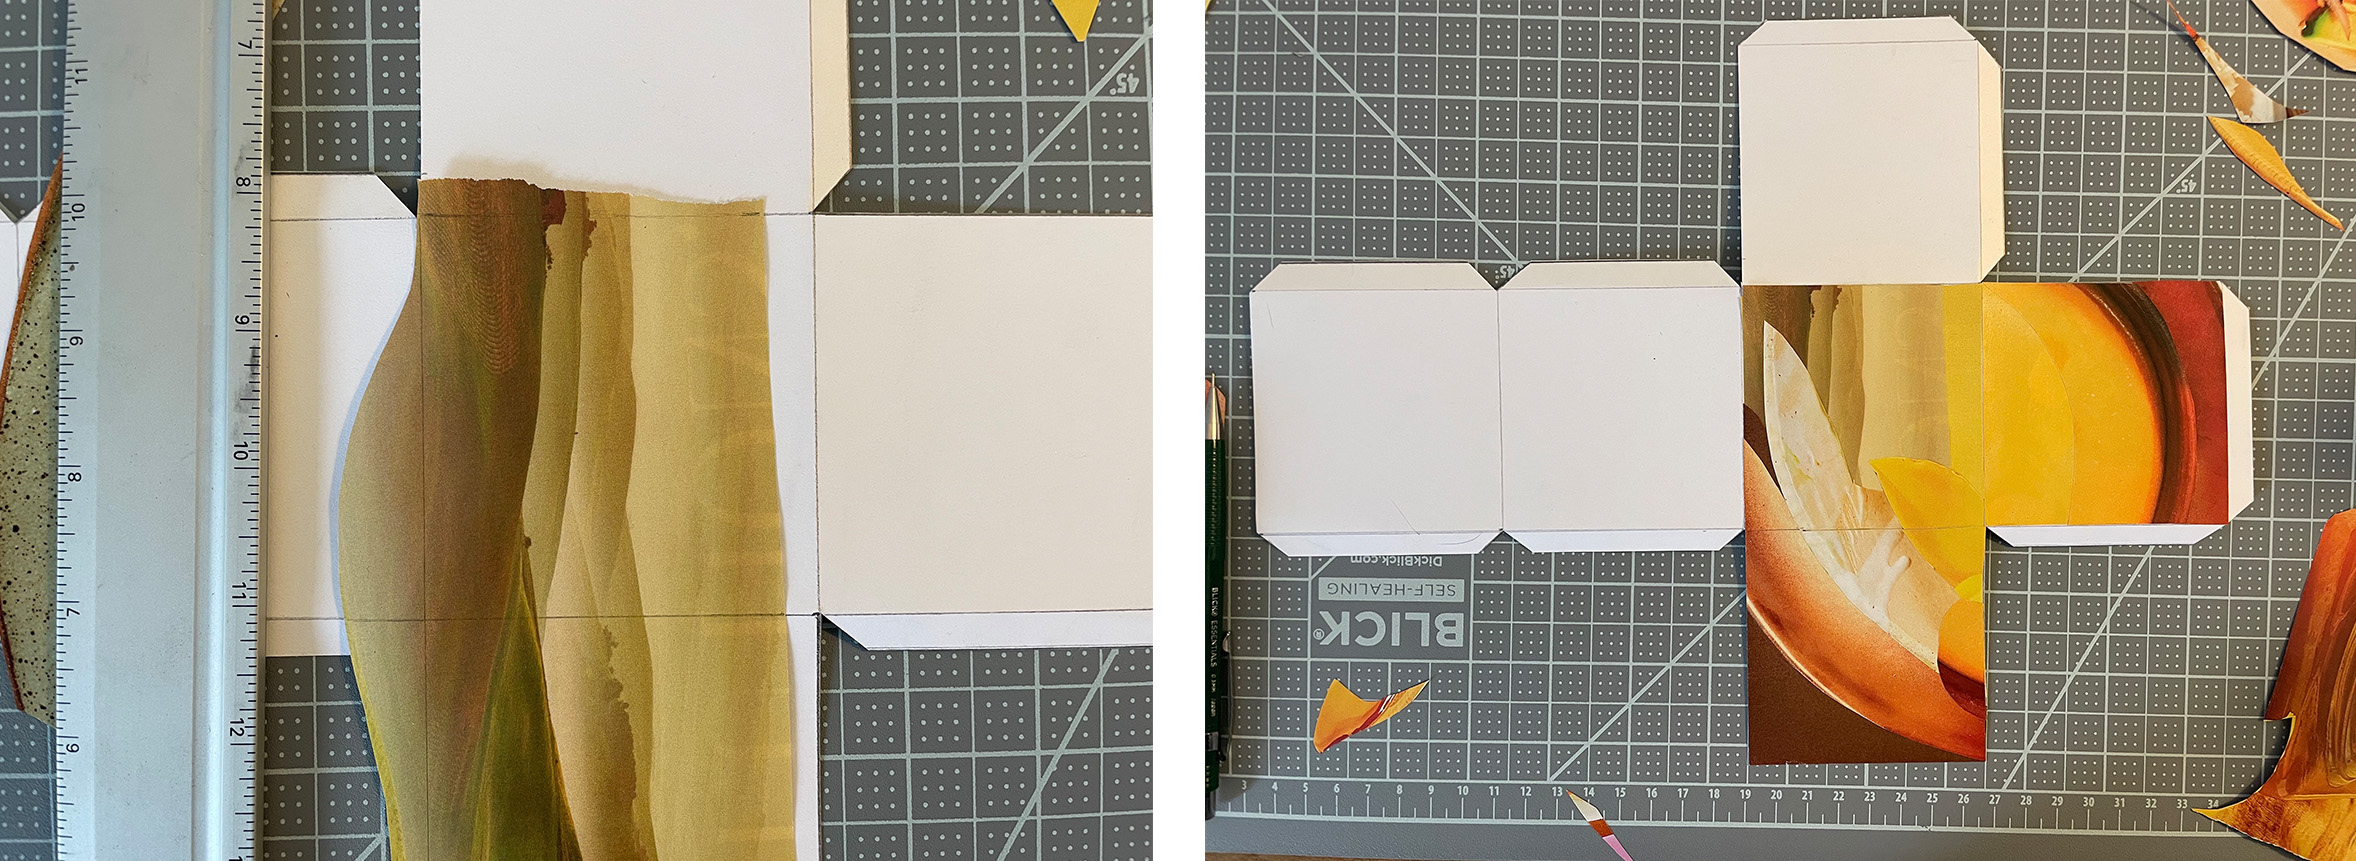
- Unlike a flat piece of paper, all sides of the cube connect to one another. Try to make the sides seamlessly transition into one another. You may need to work on two to three sides at a time, referenced in the images below.
- As you add layers, think about how you can create a sense of depth, shape, and movement throughout all sides of your cube.
Suggestions:
- Build up the layers of the different sides over time to avoid making one side appear too busy. It’s easier to come back and add more layers rather than removing ones you’ve already glued down.
- If you have a magazine piece that will cover two or more sides of the cube, cut the image where it crosses over the line(s) of the square, as shown below. Then glue those sides down separately to prevent any gaps or tears to your images when you fold the cube.
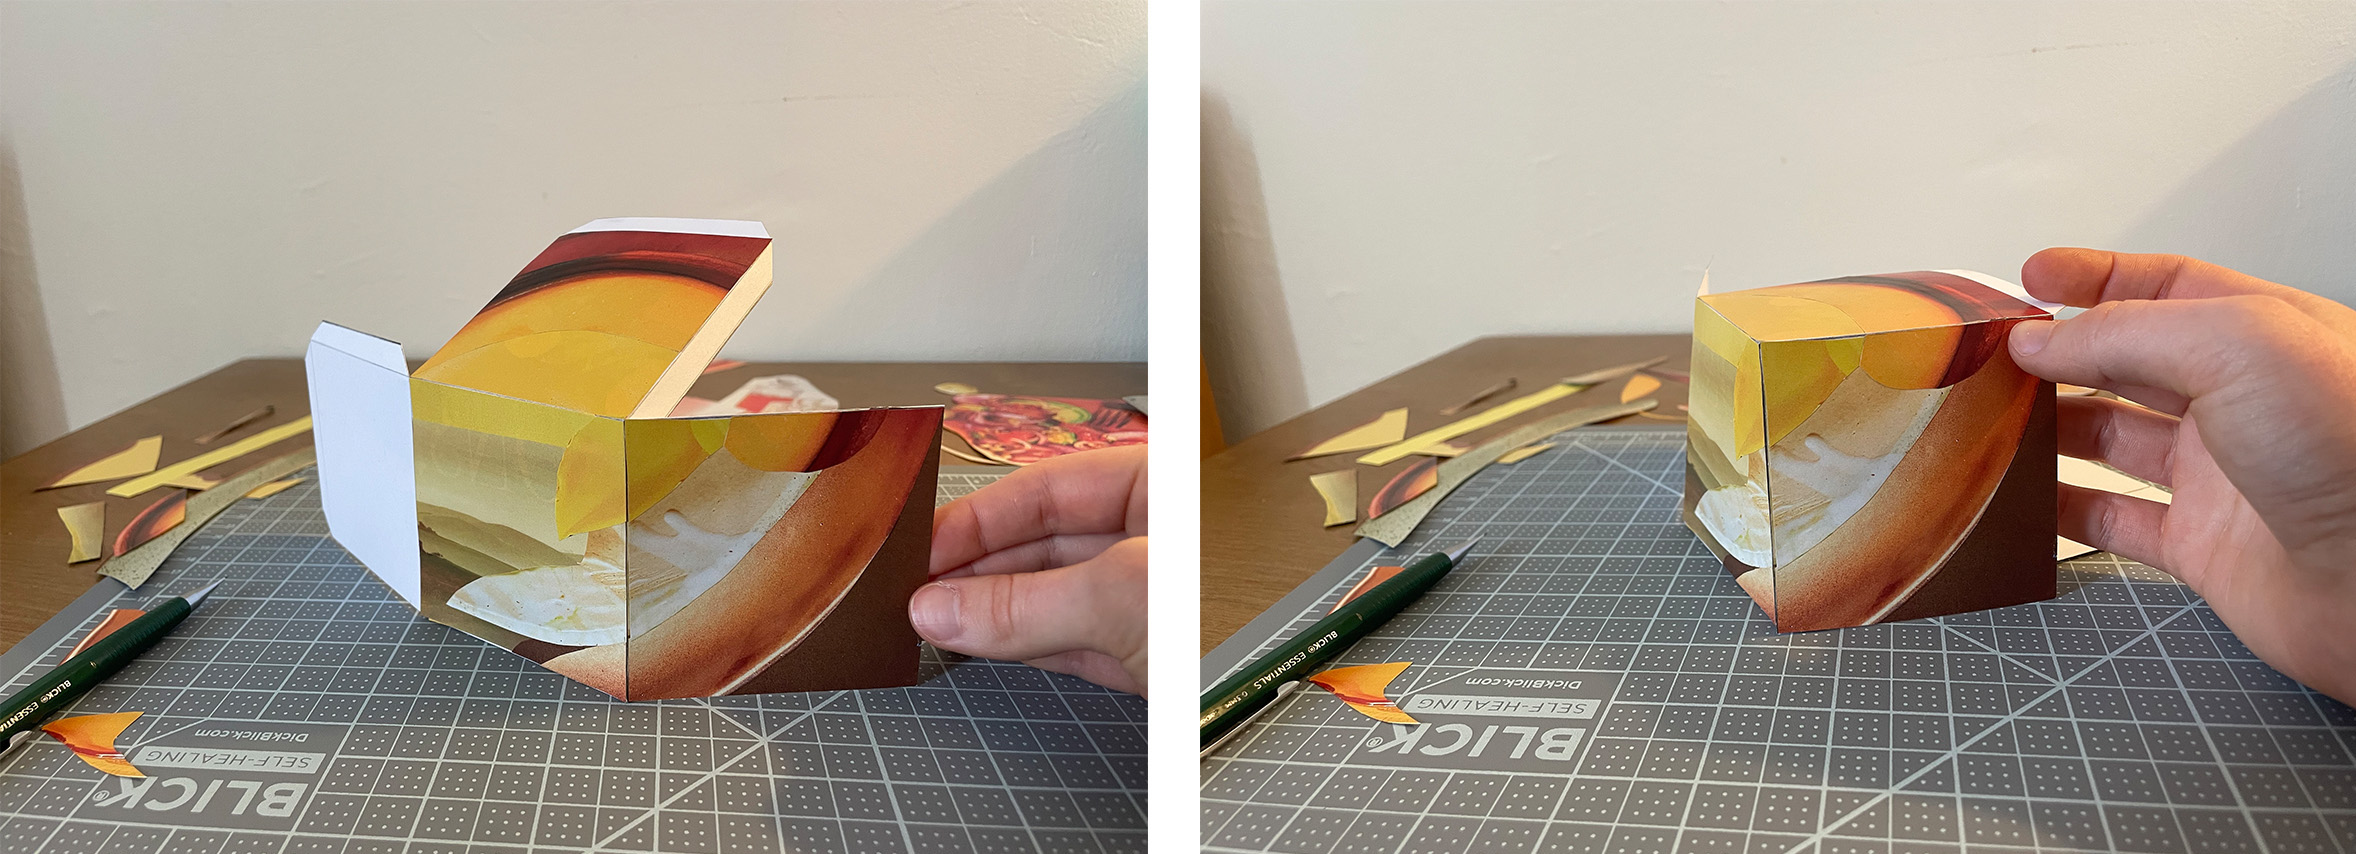
4. Fold your cube
As you begin to glue parts down throughout the process, it can be helpful to fold sides of your cube to see how it looks when they meet. When you have finished collaging all six sides of your cube, fold the sides and stick it together by gluing the tabs to the inside of your cube. Now explore how your cube looks from all sides!
RELATED READING
FROM Cooper Hewitt, Smithsonian Design Library
Cooper Hewitt, Smithsonian Design Museum’s Library contains more than 100,000 volumes, including books, periodicals, catalogs, and trade literature dating from the fifteenth through the twentieth centuries. The highlights below play with scale and structure.
Book Manifest by Irma Boom (2022)
For Dutch designer Irma Boom, the goal of Book Manifest was to experiment and develop new formats and inspire fellow artists to do the same. This small-scaled manifesto captures her work throughout the years, her relationship with size in a miniature 1,000-page work, and a collaborative effort within text and photography. Does size matter in the complexity of her thoughts and message? How would you capture and represent your life’s work?
Synergetics Folio by R. Buckminster Fuller (1977–79)
A wonderful example of how design, architecture, science, and function collaborate, American architect R. Buckminster Fuller’s Synergetics Folio is a limited edition set of ten large-scale prints. Fuller became famous for his patent of the geodesic dome (1958) in the United States. Each poster-sized print in this folio explores spherical models, showing how they can be applied to build large, rounded structures. You can view the digitized prints in the collection of the Whitney Museum of American Art.
Exploring the Atom by Marie Neurath (1958)
In Exploring the Atom, German graphic designer Marie Neurath simplifies complex scientific theory to present the structure and function of atoms, the basic unit of a chemical element. In the book, she increases the scale of these microscopic particles. She explores their form, representing their polyhedron structure through patterns of repeating geometric shapes in various colors.
UPCOMING PROGRAMS
Cooper Hewitt hosts a range of programs—including exhibition tours, lectures, hands-on workshops, and others—for visitors at all age and experience levels.
Learn more about upcoming programs at Cooper Hewitt.